# 背景
一直在弄机器视觉,
关于人体识别方面的东西,
偶然发现 TensorFlow.js 的一个模型
PoseNet Model
有趣的事情就从此开始了
# 环境信息
首先将我的开发环境介绍一下
摄像头: RGB摄像头就可以
系统: Ubuntu 16.04
浏览器: Chrome Version 75.0.3770.100 (Official Build) (64-bit)
Node.js: 10.16.0
yarn: 1.17.3
npm: 6.9.0
我好像直接是写在HTML里面,所以不需要Nodejs环境
# 码代码
发现在官方的仓库已经有完整的代码和教程,
我就不放了
这是地址: https://github.com/tensorflow/tfjs-models/tree/master/posenet
# 参考资料:
用TensorFlow.js实现人体姿态估计模型(上):https://www.jianshu.com/p/b0bcedd88a8e
# 我的代码
任何不能复现的技术博客都是扯淡,
我把我的代码放一下吧,
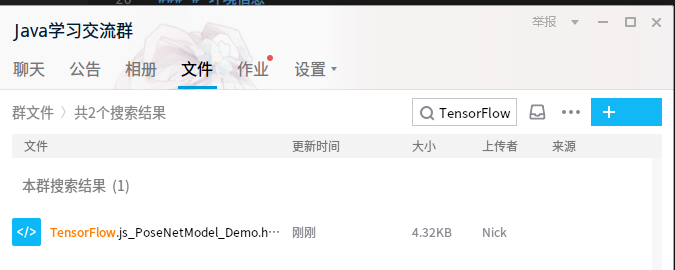
也可以直接加群: 492781269
群文件里有

然后下面放全部的代码:
1
2
3
4
5
6
7
8
9
10
11
12
13
14
15
16
17
18
19
20
21
22
23
24
25
26
27
28
29
30
31
32
33
34
35
36
37
38
39
40
41
42
43
44
45
46
47
48
49
50
51
52
53
54
55
56
57
58
59
60
61
62
63
64
65
66
67
68
69
70
71
72
73
74
75
76
77
78
79
80
81
82
83
84
85
86
87
88
89
90
91
92
93
94
95
96
97
98
99
100
101
102
103
104
105
106
107
108
109
110
111
112
113
114
115
116
117
118
119
120
121
122
123
124
125
126
127
128
129
130
131
132
|
<html>
<head>
<script src="https://cdn.jsdelivr.net/npm/@tensorflow/tfjs"></script>
<script src="https://cdn.jsdelivr.net/npm/@tensorflow-models/posenet"></script>
<style>
#videoBox {
min-width: 100%;
min-height: 100%;
position: absolute;
top: 0;
left: 0;
}
#myVideo {
min-width: 100%;
min-height: 100%;
position: absolute;
transform: scaleX(-1);
}
#output {
position: absolute;
z-index: 3;
}
</style>
</head>
<body>
<div id="videoBox">
<video src="" id="myVideo" autoplay="autoplay"></video>
<canvas id="output" ></canvas>
</div>
<h1 id="myTitle">loading model......</h1>
</body>
<script>
const myVideo = document.querySelector("#myVideo");
const myCanvas = document.querySelector("#output");
const ctx = myCanvas.getContext('2d');
var net = {};
posenet.load()
.then((net1) => {
document.querySelector("#myTitle").style.display = "none";
net = net1;
setupCamera();
})
function poseDetectionFrame() {
net.estimateSinglePose(myVideo, {
flipHorizontal: true
})
.then((pose) => {
let score = pose.score;
let keypoints = pose.keypoints;
if (score >= 0.2) {
ctx.clearRect(0, 0, myCanvas.width, myCanvas.height);
for (let i = 0; i < keypoints.length; i++) {
const keypoint = keypoints[i];
if(keypoint.score > 0.1) {
const {y, x} = keypoint.position;
drawPoint(ctx, y, x, 10, "red");
}
}
}
});
requestAnimationFrame(poseDetectionFrame);
}
function setupCamera() {
let exArray = [];
navigator.getUserMedia = navigator.getUserMedia || navigator.webkitGetUserMedia || navigator.mozGetUserMedia || navigator.msGetUserMedia;
navigator.mediaDevices.enumerateDevices()
.then(function (sourceInfos) {
for (var i = 0; i < sourceInfos.length; ++i) {
if (sourceInfos[i].kind == 'videoinput') {
exArray.push(sourceInfos[i].deviceId);
}
}
})
.then(() => {
let deviceId = exArray[exArray.length - 1];
navigator.mediaDevices.getUserMedia({
audio: false,
video: {
deviceId: deviceId
}
})
.then(stream => {
myVideo.srcObject = stream;
myVideo.onloadedmetadata = () => {
myVideo.width = myVideo.offsetWidth;
myVideo.height = myVideo.offsetHeight;
myCanvas.width = myVideo.width;
myCanvas.height = myVideo.height;
poseDetectionFrame();
};
})
.catch(err => {
console.log
});
});
}
function drawPoint(ctx, y, x, r, color) {
ctx.beginPath();
ctx.arc(x, y, r, 0, 2 * Math.PI);
ctx.fillStyle = color;
ctx.fill();
}
</script>
</html>
|
PS:
如有错误,还请多多指出来~
– Nick
– 2019/07/22
